Author Archives: Nadia

Buttermilk Scones with Tart Cherries

Scones with Tart Cherries

“The highlander lay dying in his bed. In death’s agony, he suddenly smelled the aroma of his favorite scones wafting up the stairs. He gathered his remaining strength, and lifted himself from the bed. Leaning agains the wall, he slowly made his way out of the bedroom…and forced himself downstairs. He leaned against the door frame gazing into the kitchen.

Were it not for death’s agony, he would have thought himself already in heaven: for there, spread out upon newspaper on the kitchen table were dozens of his favorite scones.

Was it heaven? Or was it one final act of heroic love from his devoted wife, seeing to it that he left this world a happy man?

Mustering one great final effort, he threw himself towards the table..his salivating parted lips; the wondrous taste of the scone was already in his mouth, seemingly bringing him back to life. His hand made its way to the nearest scone at the edge of the table, when it was suddenly smacked with a spoon by his wife. “Stay out of those” she said, “They’re for the funeral.”

(Highland Humor.. Scottish joke)

Tart Cherry Scones

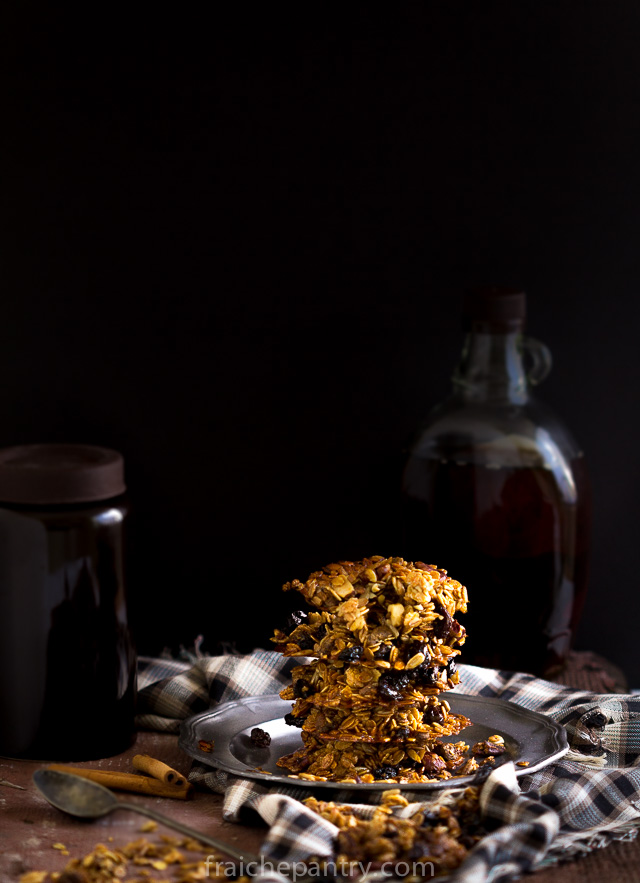
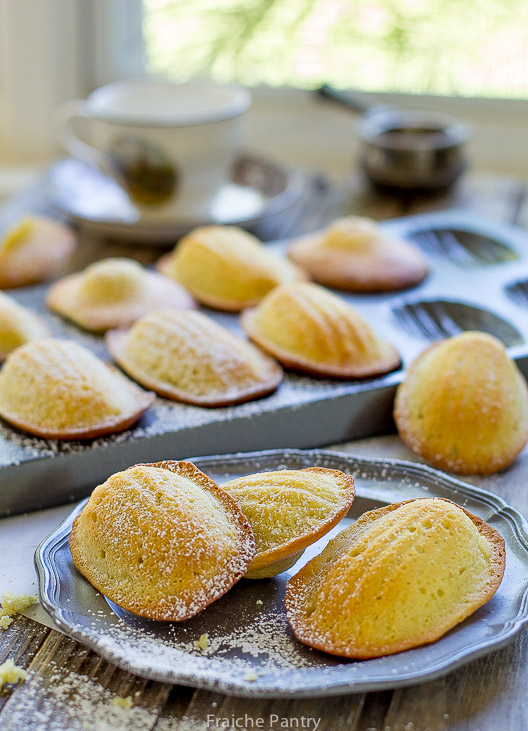
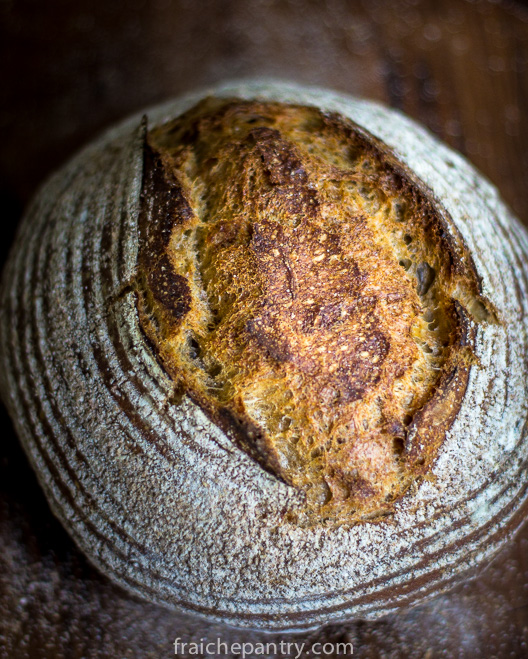
Ah! the smell of fresh baked scones. It never ceases to make me feel all warm and fuzzy inside.

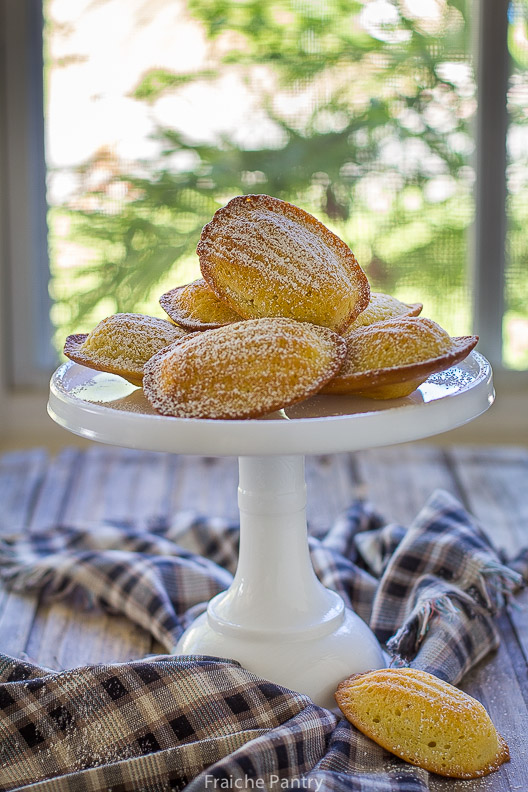
Like Proust and his madeleines and The Highlander and his scones, we all have that one dish, smell or aroma that takes us back in time and makes us feel nostalgic . For me, scones, remind me of home. They always take me back to those cherished moments I spent as a child visiting my grandmother for an afternoon tea after school. Their familiar smell is comforting – It makes me feel home. I hope this recipe will take you back to your own cherished moments..

Scones

But before we get to the scones, let me just say: a lot has happened since I last posted. Oh, the stress of moving. Picking up and moving your entire life can be one of the most challenging times in one’s life. First, it took me two months of decluttering and packing – sifting through trash and treasures, getting rid of things I will not miss. Then another two months of unpacking and organizing. Finally, everything (well, almost) is unpacked. All my things are where they should be. My kitchen is organized  – my dishes are neatly stacked in the cabinets, yet somehow, I still felt unsettled. Something was lacking – it didn’t feel like home. When my sister suggested I bake something, I realized that since we’ve moved in the new house, I haven’t cooked or baked anything. We were so busy unpacking we lived on take out. The house was lacking the smell of home cooking – the kind that brings good memories and gives us a feel of comfort and peace. It was time to bake and make this house smell and feel like “home sweet home” and what better than savoring a batch of freshly baked scones on a sunday morning…

Scones

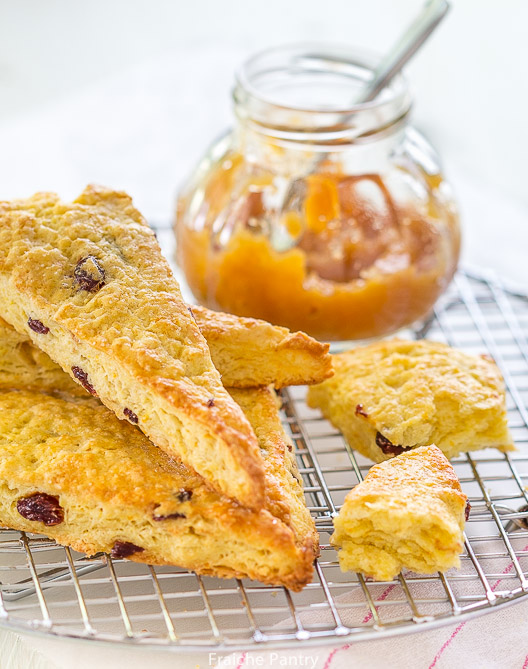
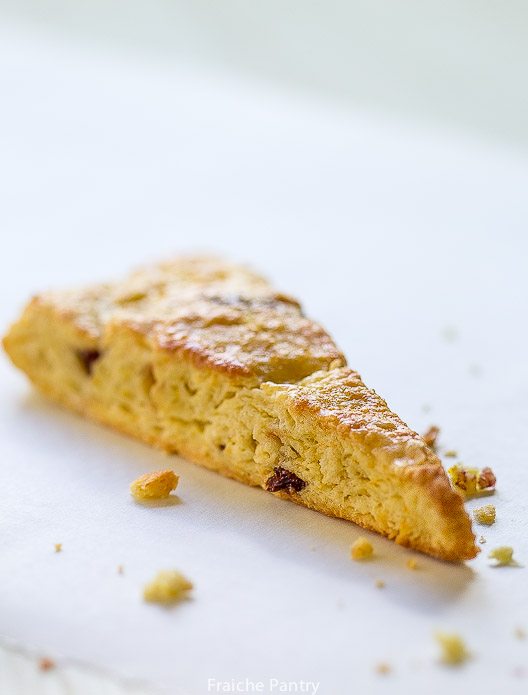
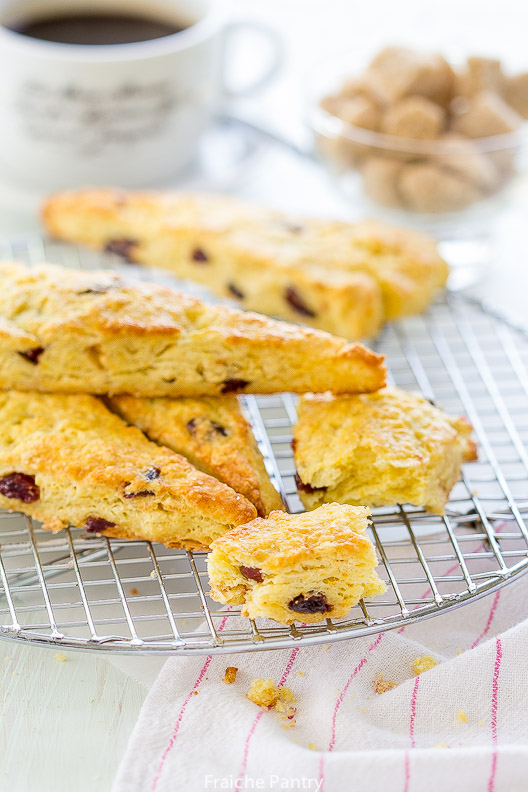
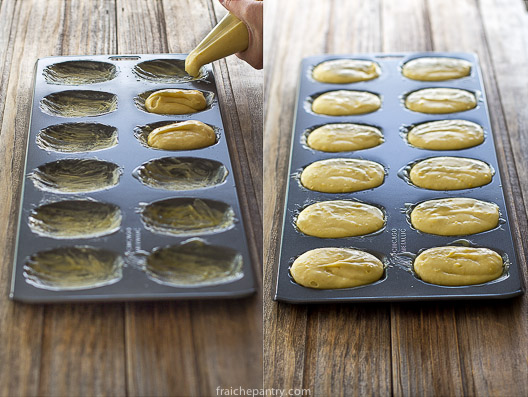
There are many debates on how to make traditional scones. To suit my own taste, I do not burden myself with authenticity. I like my scones light with crispy exterior and soft, flaky interior. Absolute freshness is key – they should be enjoyed straight from the oven.

Whipping up perfect scones, though it seems like child’s play compared to other confections, all too often result in flat dense biscuits barely worth the effort of buttering.  So, remember, the less you handle dough the lighter and flakier your scones will be.

Scones


Buttermilk Scones with Tart Cherries
 
Ingredients
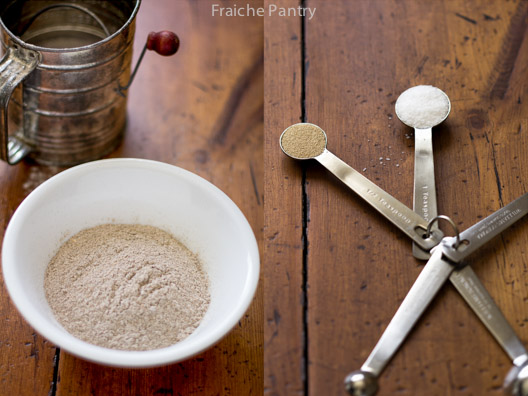
  • 2 cups all-purpose flour
  • ¼ cup granulated sugar
  • 3 tsp baking powder
  • 4 oz cold unsalted butter, cut into small pieces
  • 1 egg
  • ½ cup buttermilk
  • Zest of 1 orange
  • 1 tbs of coarse sugar
  • ½ cup tart cherries
Instructions
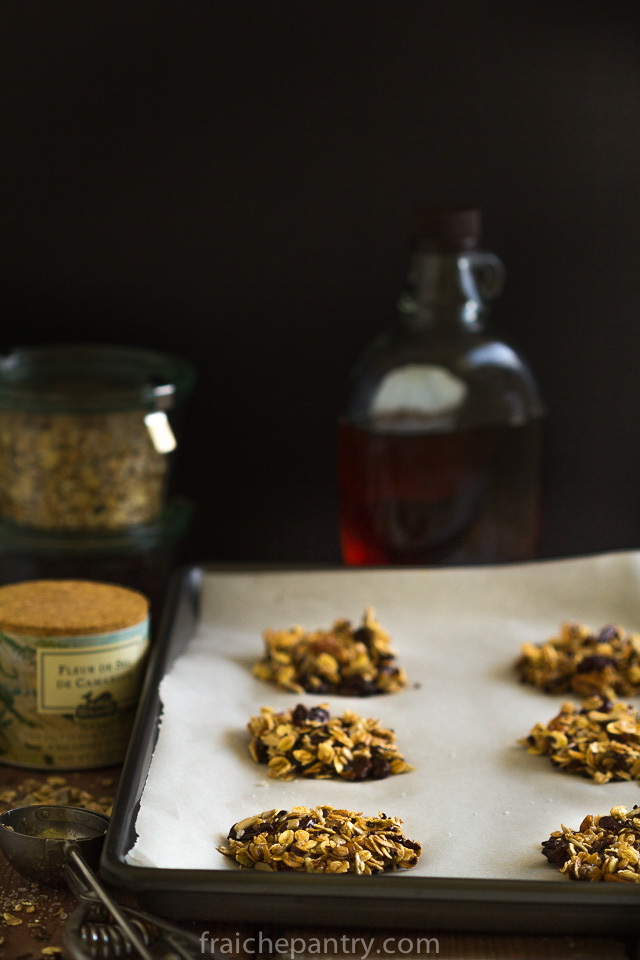
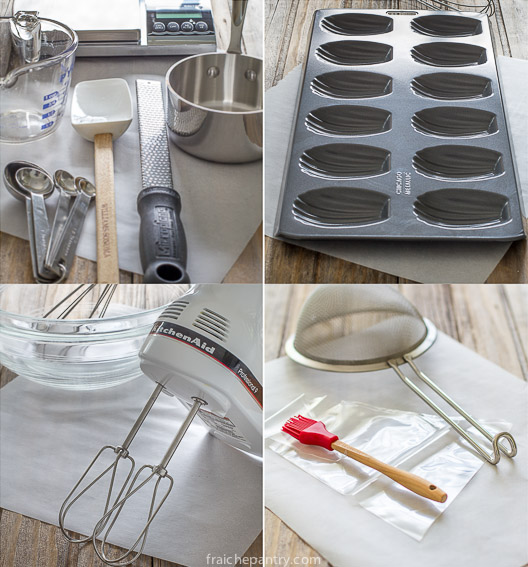
  1. Preheat oven to 350 degrees. Line a baking sheet with parchment paper.
  2. In a food processor combine the flour, sugar, baking powder and salt and pulse to combine. Add the butter and pulse until mixture resembles pea-size crumbs. Stir tart cherries.
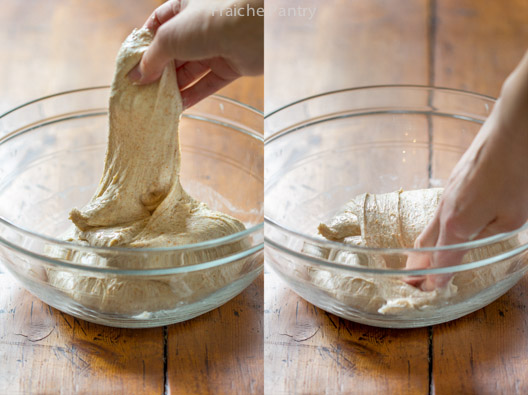
  3. If mixing by hand, combine all dry ingredients. Add cubed butter and cut into flour with your fingertips or a pastry cutter until pea-size crumbs form.
  4. In a small bowl, combine the egg, buttermilk and orange zest. Whisk until blended and add to flour mixture. Pulse until clumps of dough form or use a fork if mixing by hand.
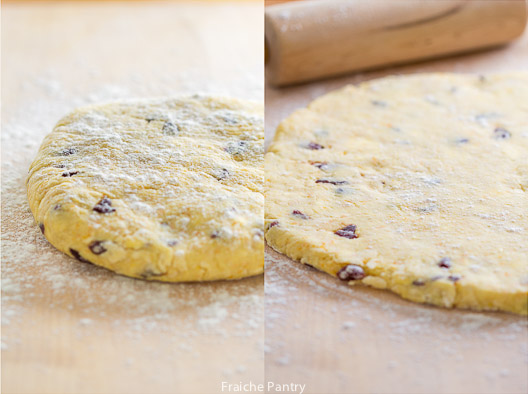
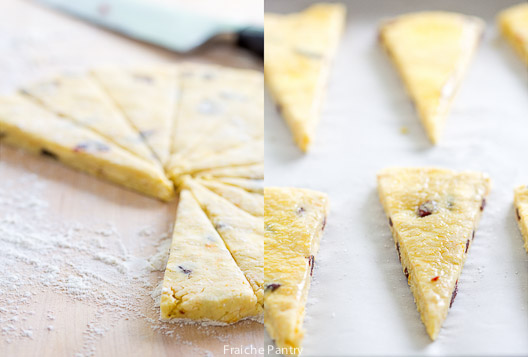
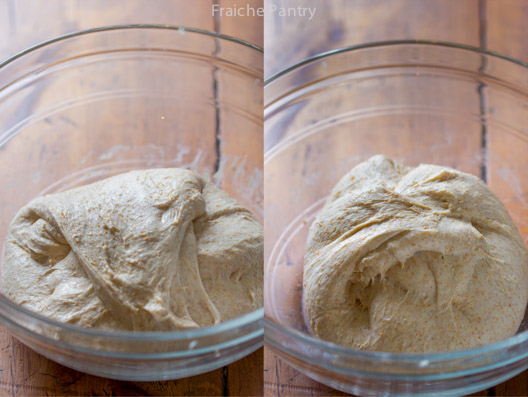
  5. Turn the dough onto a lightly floured surface and press it together with your hands until it comes together into a ball. Roll out the dough to about ½ inch thick. Cut it into equally sized wedges or using a pastry round cutter cut it into rounds.
  6. Place scones an inch apart onto prepared baking sheet. Brush with egg wash and sprinkle with sugar. Bake at 350 degrees for about 25 minutes or until golden. Let scones cool for few minutes before serving..
Notes
Do not overwork the dough. The less you handle it the better..

You can freeze a batch of unbaked scones for later use. First lay them on a cookie sheet lined with parchment paper. Cover with plastic wrap and freeze for an hour. Once frozen, wrap them individually in plastic wrap and use a plastic freezer bag to store them in the freezer. Glaze before baking.

If you don't have buttermilk, you can substitute by adding a tablespoon of lemon juice to a cup of milk or cream.


Madeleines

Madeleines

I could try to describe to you why I love madeleines but the truth is no one can describe madeleines like Marcel Proust.  The French author made madeleines world famous in his literary masterpiece “Remembrance of Things Past”.  Proust’s poetic description of what it feels like to eat a madeleine may convince you to experience your own “Proustian Madeleine Moment.”

Excerpt from “Remembrance of Things Past”:

“…one day in winter, as I came home, my mother, seeing that I was cold, offered me some tea… She sent out for one of those squat plump little cakes called “petites madeleines” which look as though they had been molded in the fluted valve of a scallop shell…

I raised to  my lips a spoonful of the tea in which i had soaked a morsel of the cake.  No sooner had the warm liquid mixed with the crumbs touched my palate than a shudder ran through me and I stopped, intent upon the extraordinary thing that was happening to me. An exquisite pleasure invaded my senses…

 And suddenly the memory revealed itself. The taste was that of the little crumb of madeleine which on Sunday mornings at Combray… my aunt Leonie used to give me, dipping it first in her own cup of tea or tisane … and the whole of Combray and its surroundings, taking shape and solidity, sprang into being, town and garden alike, from my cup of tea.”

Marcel Proust (1871-1922)

Lemon Scented Madeleines

I hope this recipe for madeleines will conjure up some great memories for you.

Fun Facts:

Although typically referred to as a cookie, madeleines are actually small buttery tea cakes. There are several stories circulating about the history of madeleines. Which story is correct?  No one knows. But historians believe they originated in the town of Commercy in the Lorraine region of France during the 18th century.

Things I’ve learned:

To produce plump, delicate and delicious madeleines you will need to follow few basic guidelines:

  1. Bring cold ingredients to room temperature before making the batter
  2. Make the batter the day before and keep it cold until ready to bake
  3. Freshly grated lemon zest is essential. Try to use organic lemons if you can
  4. Some say baking powder should never be used in making madeleines. In my opinion it takes a fair amount of patience and confidence to make them without any leavening agent. I find the use of baking powder makes the recipe full proof, especially if you are making madeleines for the first time.
  5. Freeze the madeleine mold for few minutes before buttering it, otherwise the melted butter will just pool in the center of each cavity (see picture below – mold on the right side was cooled in the freezer before buttering.)

Buttered Madeleine Mold


When piping or scooping the batter into the mold, try to not overfill the cavities. If you notice in the picture below, I put too much batter. I was lucky it didn’t over flow. Next time I will use slightly less. No need to spread the batter. It will spread on its own.

Madeleines


Tools you will need:

Tools

  • Madeleine mold (can be purchased for around $12 on amazon or at target)
  • Electric hand mixer or whisk
  • Kitchen scale
  • Sifter
  • Lemon zester
  • Spatula
  • Measuring cups and spoons
  • Small sauce pan
  • Pastry brush
  • Pastry bag
  • Mixing bowls

Madeleines


5.0 from 1 reviews
Madeleines
 
Ingredients
  • 3 oz butter
  • 2 eggs
  • 4½ oz sugar
  • 6¼ oz sifted flour
  • 1 tsp baking powder
  • 2½ tbs of milk (room temperature)
  • Finely grated zest of 2 lemons
  • Pinch of salt
Instructions
The day before
  1. Prepare the batter. In a small saucepan melt butter taking care not to burn it. Remove the saucepan from the heat pour the butter in a cup or small bowl to cool it down quickly. Sift together the flour, salt and baking powder and set aside.
  2. In another bowl, whip the eggs and sugar until thick and pale for about 5 minutes. Gradually add the milk while mixing. Fold in the sifted flour and the lemon zest until well incorporated. Finally whisk in the butter trying to add volume to the batter. Cover the bowl with plastic wrap, and chill in the refrigerator overnight.
The next day
  1. On the day of baking, preheat the oven to 400°F. While the oven is preheating, freeze the madeleine mold for 15 minutes. Take the mold out of the freezer and brush it generously with melted butter. Sprinkle with flour if you wish. Tap off any excess flour.
  2. Fill a pastry bag fitted with a plain tip with the batter and pipe it into the Madeleine mold, alternatively, you can spoon the batter into the mold. Bake in the preheated oven for 5 minutes until they begin to color. Lower the oven temperature to 325°F and continue cooking for 5-7 minutes. Remove the Madeleines from the oven, unmold immediately, and leave to cool on a wire rack.


Warm Chidori Kale Salad with Goat Cheese

Warm Kale Salad

Kale is cool!

Today I discovered something.  Ornamental kale is edible to humans.  Who knew?  Call me ignorant but I had no idea.  In fact, in France we don’t know what to call it, let alone what to do with it.

“The French don’t know from kale.”  This according to a New York Times article (September 2013)  about “an American woman who embarks on a mission to persuade France to embrace the leafy greens.

Chidori Kale

For years I have seen ornamental kale used in street landscaping and home gardens but It never occurred to me that it is genetically the same as kale grown for food crops.  So I did some research and learned that while it is edible, some critics say it doesn’t taste as good as the newer culinary varieties.

I spotted the “Chidori” variety at the Farmers Market in Santa Monica.  It looked so beautiful I had to grab some.

I really didn’t know what to do with it, so I asked the lady at the stand if she had any suggestions.  She said “try it.”  I said “Yes, I want to try it. Do you have any suggestions?”  She gave me a look. Then she smiled, handed me a leaf and said “try it.”  I realized she meant “taste one.”  So I did.  Wow and wow!  It was crazy good.  I was expecting it to be bitter and stringy.  To my surprise, it was exceptionally sweet and mild.  Very tender with non-fibrous stems.  “This is really good” I said.  “Yes!” she replied, “It is so good, it doesn’t matter how you prepare it.  It will still be good.”

Driving back home, I racked my brain to think of a way to use my new discovery.  I vaguely remembered seeing a  recipe for a warm bitter greens salad with goat cheese.  I could not recall where I saw it nor which bitter greens nor which dressing they used.  I thought kale is considered a bitter green, so I decided to improvise and use a classic french Dijon mustard vinaigrette with Chidori kale.  And boy, was the lady at the Farmers Market right.  It turned out delicious.

Whatever you decide to make with the Chidori kale, give it a shot and let me know.

This salad is great  for a Sunday brunch or a speedy weeknight dinner. Enjoy!

Warm Chidori Kale Salad with Goat Cheese
Author: 
 
Ingredients
  • 4 soft boiled eggs
  • 4 tbs of olive oil
  • 4 cloves of garlic thinly sliced
  • 1 bag of fresh Chidori kale leaves trimmed
  • 4 oz mild goat cheese
  • salt and pepper
  • Dijon mustard vinaigrette
Instructions
  1. In a medium size sauce pan, bring water to boil. Add the eggs, cover and remove from heat. Let stand for 6 to 7 minutes, then drain.
  2. Hold the eggs under running cold water and gently peel them. Let sit at room temperature.
  3. In a non-stick pan, heat the olive oil on medium heat. Add, the garlic, kale, some salt and pepper and cook for 3 to 5 minutes just until the kale is wilted.
  4. Divide the kale between two plates.
  5. Top each with two halved boiled eggs and chunks of goat cheese.

Serve with toasted country bread and a drizzle of Dijon mustard vinaigrette.
Vinaigrette
Author: 
 
Ingredients
  • clove of garlic crushed
  • tbs red wine vinegar
  • /2 tsp Dijon mustard
  • /4 cup olive oil
  • /2 tsp kosher salt
  • /4 tsp freshly ground pepper
Instructions
  1. In a small bowl, whisk together the vinegar, mustard, garlic, salt and pepper.
  2. Slowly add the olive oil and whisk until emulsified.
  3. Taste and adjust seasoning.


Fennel, Green Apple and Mint Salad

Fennel Salad

Fennel is among my favorite winter vegetables.  It is so incredibly versatile that I’m always surprised people don’t use it as often as they should.  You can eat it raw, roasted or braised. It pairs exceptionally well with fish and can be a nice addition to any pork or meat dish. The fronds can be minced and used as a fresh herb.

Fennel

Fennel is available all year but it is best in the winter when it has a more aromatic taste.  It is very easy to prepare. You simply trim off the top and remove the fringy outer layer.

If you are a fennel lover like me, then you are in for a treat. Pairing fennel with granny smith apples and fresh mint creates an incredibly fresh and tasty salad.

Fresh Mint


For this salad you will need to slice the apples and the fennel as thinly as possible. Now will be a good time to dust off your mandoline.

Safety first: 

When slicing with the mandoline, make sure you use the hand guard correctly. Do not attempt to use the mandoline without the hand guard. The blades are super sharp and dangerous.

Fennel and Green Apple Salad
Serves: 4
 
Ingredients
  • 2 Granny Smith Apples
  • 2 fennel bulbs
  • 10 fresh mint leaves
  • 2 tbs lemon juice
  • ½ tsp Dijon mustard
  • ½ tsp honey
  • 4 tbs olive oil
  • Kosher salt
  • Freshly-ground black pepper
Instructions
  1. To make the vinaigrette: place the honey, lemon juice, Dijon mustard, salt and pepper in a bowl. Stir until well combined. Add the olive oil. Mix well then taste. If it’s too acidic add more olive oil and a little more honey if necessary. Adjust salt and set aside.
  2. Using a mandoline or a sharp knife, slice the apples and the fennel as thinly as possible. Arrange the apple and fennel slices on a plate. Sprinkle with mint leaves and spoon over the dressing.
Notes
For some variations, add few slices of radishes, a sprinkle of crumbled blue cheese and/or few candied walnuts. You can also serve this salad with some good brie and a slice of crusty bread. Allow the brie to settle at room temperature before serving..


Whole Grain Bread

Whole Wheat Bread

Julia Child once said: “ How can a nation be called great if its bread tastes like kleenex?

So, does bread today taste like kleenex?  pretty close in my opinion and unless you are lucky enough to live around the corner from some of the great artisan bakeries, chances are any humble loaf you make at home is far better than anything you buy at the store.

Engredients In fact some may be surprised how many people are now baking their own bread.

Thanks to a New York Times article about an old bread making technique most recently revived by Jim Lahey of Sullivan Bakery in New York, more people are enjoying homemade bread.

Once I started making my own bread I never went back to store bought loaves.  I usually make this loaf with homegrown culture but for this post I am using a small amount of commercial yeast.

The pictures below show the stretch and fold technique.

Bread Dough-2

Dough becomes smooth and puffy after couple of series of stretch and folds.

Bread Dough

Bread Dough
Whole Wheat Bread

Whole Wheat Bread
 
Ingredients
  • 200g whole wheat flour
  • 300g bread flour
  • 10g wheat germ
  • 10g wheat bran
  • 375g lukewarm water
  • ¼ tsp instant yeast
  • 10g kosher salt
Instructions
The day before:
  1. In a large bowl combine bread flour, whole wheat flour, wheat bran and wheat germ. Sprinkle the yeast over the flour mixture and stir to disperse. Add water and mix until no dry flour remain. Cover bowl with plastic wrap and let sit at room temperature for 30 minutes.
  2. After the resting period, add the salt and a couple tbs of lukewarm water. Using wet hands, mix the dough squeezing it between your fingers until salt is thoroughly mixed in.
  3. Cover the bowl with plastic wrap and let the dough rest for a period of 2 hours during which you will perform a series of folds every 30 minutes taking care not to deflate the dough. To do a fold, grab one side of the dough, stretch it out and folded over itself - slightly rotate the bowl and grab another side of dough and repeat the fold until you perform 4 folds (think of the dough as having four corners and you will perform a stretch and fold for every corner). This will strengthen the dough. You will do this series of folds every 30 minutes during the 2 hour resting period.
  4. After the last fold let dough rest in covered bowl for 2 hours in the refrigerator.
  5. If not using a proofing basket, line a medium size bowl with a dry kitchen towel. Dust it generously with flour.
  6. Transfer dough onto a flour dusted kitchen counter. Shape the it into a taut boule and pop it seam side up into floured lined bowl or proofing basket. Dust top of dough with flour. Loosely cover with a piece of plastic wrap and a kitchen towel on top. Leave in refrigerator overnight.
Baking day:
  1. Place a heavy oven proof pot with lid in cold oven. Preheat to 500 degrees.
  2. Take the dough out of the refrigerator and gently invert dough onto a piece of parchment paper.
  3. Using oven mitts, remove hot pot from oven. With a sharp knife score dough by making two incision across the top.
  4. Grab sides of parchment paper and carefully lower dough into hot pan taking care not to burn yourself. Cover with lid and return to oven. Bake at 450 degrees for 25 minutes. Reduce heat to 400 - carefully remove lid and continue baking for another 20 minutes or so until crust is golden brown.
  5. Transfer loaf to a cooling rack and let cool.
Notes
To get a nice open crumb you need a fairly wet dough about 75% hydration. Different flour brands have different absorption rate and depending on the brand you use, you may need to slowly increase the amount of water..


Pasta with Wild Arugula

Pasta with Wild Arugula


Pasta tossed with garlic infused olive oil and fresh wild arugula makes for an incredibly light and flavorful dish. This recipe exemplifies speedy weeknight dinner. It is literally ready within few minutes.

Wild Arugula


The real star here is the wild arugula. It has clean and peppery taste that is quite different from the more familiar milder arugula. To truly appreciate its flavor you should eat it raw.  It is simply irresistible.

Pasta


All I know is I cannot have enough of it. I use it in everything. Most days I enjoy it as a salad. Sometimes I sprinkle it on pizza and other days I add it to  my sandwiches..

Garlic Infused Olive Oil

Pasta with Wild Arugula
 
Ingredients
  • 1 lb pasta shells
  • 1 bunch of wild arugula
  • 4 cloves of garlic thinly sliced
  • ½ tsp chili pepper flakes
  • Olive oil
  • Salt and pepper
  • Freshly grated parmesan
Instructions
  1. Cook pasta according to package instructions
  2. In a large pan, gently heat olive oil. Add garlic slices and cook on low heat until slightly brown. Add chili pepper flakes and the wild arugula. Toss and remove from heat.
  3. Drain the pasta then toss it in with the wild arugula. Season with salt and pepper and serve immediately with freshly grated parmesan.
Notes
When you brown the garlic, be sure not to burn it - otherwise it will taste bitter.


Cedar-Planked Brie with Shiitake Mushrooms

Cedar-Planked Brie

For me a piece of cheese and a crusty baguette make the perfect marriage. Add a glass of wine and you have a menage a trois made in heaven.

France produces over 200 types of cheeses and it can be quite difficult to choose a favorite. Some varieties are more known than others. One of my favorites is Brie –  or as a connoisseur would call it  “true Brie”.

Considered to be perhaps the most popular cheese in the world, authentic Brie has a creamy texture and a sweet buttery flavor with a hint of mushrooms.

Planked-Brie with Mushrooms

Brie’s popularity soared in the 70s and 80s. Unfortunately, not all Bries are created equal. French Law requires that Brie be made from unpasteurized (raw) milk. In 1985 the FDA began the require that all cheeses be pasteurized or cured a minimum of 60 days which pretty much outlawed true Brie in the United States.

To make matters worse, France, like England with its cheddar, neglected to protect/trademark the term Brie. As a result, the name Brie became a generic term allowing for a wide variety of knock-offs to flood the American market.

However, in 1980, Brie de Meaux and Brie de Melun were awarded AOC (appellation d’origine contrôlée) status and were protected under French law. They are considered true Brie and both are produced just a few miles east of Paris.

Mushrooms
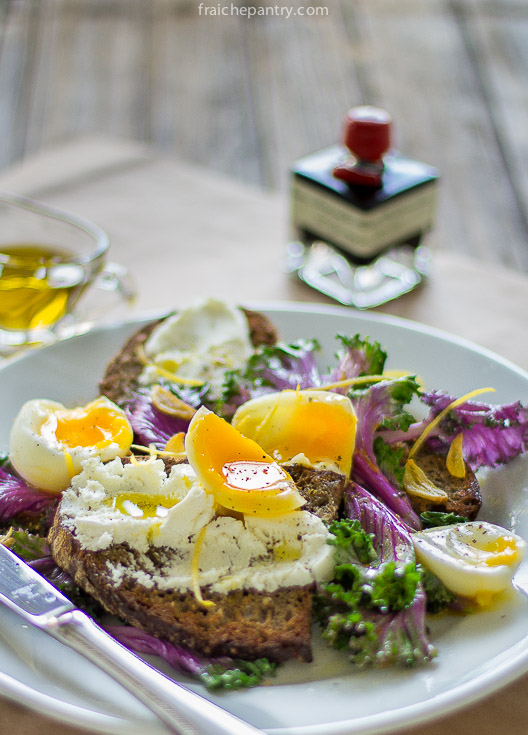
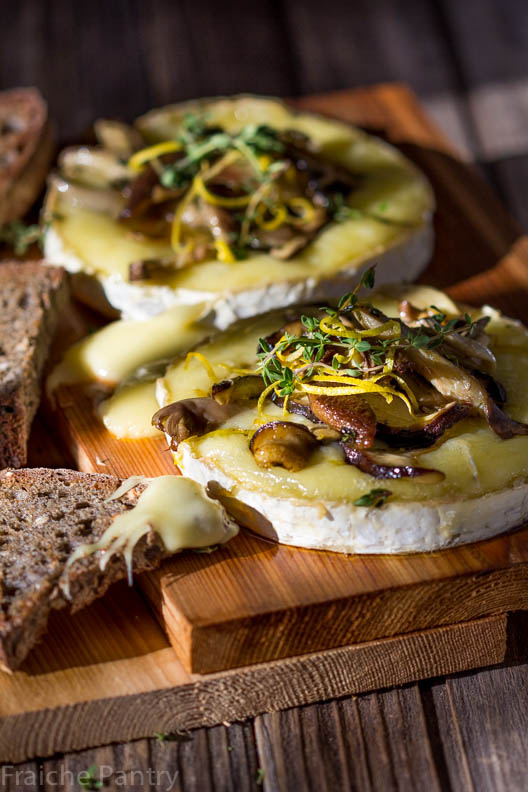
Brie de Meaux is more delicate than its sister Brie de Melun which is more rustic and full flavored. Good luck finding either of them in the United States. They are both made from raw milk and thus prohibited from entering the US.

The only way for Americans to experience true Brie is to travel outside of the US.

For this recipe I used a Brie-style cheese made from pasteurized milk. The use of soaked cedar plank adds a subtle woodsy flavor to the baked brie which further enhances the flavor of the mushroom topping.

I usually bake cedar-planked Brie on the bbq using indirect heat.  Today I’m doing it in a 400 degree oven.

If you don’t have a cedar plank on hand, use a baking sheet lined with parchment paper.

5.0 from 2 reviews
Cedar-Planked Brie with Shiitake Mushrooms
Serves: 4
 
Ingredients
  • 1 wheel firm, ripe brie about 13.5 oz room temperature
  • ½ lb fresh shiitake mushrooms
  • ¼ lb fresh oyster mushrooms
  • 1 clove garlic thinly sliced
  • 4 sprigs fresh thyme
  • The zest of one lemon
  • ½ cup dry white wine
  • Olive oil
  • Salt and pepper
Instructions
  1. Soak Plank in lukewarm water for 2 hours. You may have to weigh it down to submerge.
  2. Preheat oven to about 400 degrees.
  3. Put mushrooms in a bowl and drizzle with olive oil just enough to moisten.
  4. Add garlic slices, lemon zest, thyme, salt and pepper and toss to combine.
  5. In a large skillet heat one table spoon of olive oil. Add the mushroom mixture and the wine. Cook until golden brown. Remove from the heat and keep warm.
  6. Drain the plank and place onto a baking sheet lined with foil. Lightly brush the plank with olive oil. Using a warm knife, carefully cut the brie wheel in half horizontally. Try to not damage the outside rind. It will keep the Brie from leaking. Place both halves rind side down onto prepared cedar plank. Bake in oven for 10 to 12 minutes or just until cheese starts to slightly bubble. Do not overcook or it will start to overflow.
  7. Remove the brie from the oven. Keep it on the plank. Top each half with half of the mushroom mixture.
  8. Serve directly from the plank with a nice crusty baguette or slices of country bread.
Notes
To cut the brie in half, try using a piece of unflavored dental floss. With a pairing knife, make an initial cut halfway down along the outer side of the brie. Take a long piece of dental floss and wrap each end around each index finger. Starting at the front of the wheel at the initial cut, cut through the wheel with the floss, separating the top half from the bottom.


Muesli Cookies with Fleur de Sel

Muesli Cookies

Years ago I was living in Chambery, a beautiful little town in the Rhône-Alpes region of France.  There was a little cafe, where I used to stop for my mid-morning caffeine fix. I would get my cafe espresso and a small cookie called “Croustillant de Muesli Choco au Sirop D’érable” (Muesli chocolate crunch-cookie with maple syrup).

I loved those cookies. I was so addicted to them I would literally devour them by the handful. They were that crazy-good. Just the right amount of sweetness and salt. Crispy and  super-crunchy.  And if that wasn’t enough, they were super nutritious.

I’ve never been able to find anything like them in Southern California.  Every now and then, I would get a craving for them so I decided it was time to try and make my own Croustillant de Muesli Choco.

After some online research and few recipes later, I struck out. I couldn’t find any recipe resembling the Croustillant de Muesli I had at that cafe. I decided to just start with a basic recipe for granola bars and work my way from there.

I made several attempts at replicating those wonderful cookies. My goal was to reduce the amount of sugar usually found in commercial granola bars.

One problem I kept running into is how to get the mixture to clump together without adding too much honey or maple syrup. Keep in mind, I was working from a memory of something that goes several years back.

Muesli Cookies-3

After more research on the internet, I discovered that one of the many secrets to making homemade granola bars was to add an egg white. The lightly beaten egg white acts like a glue and helps the granola mixture stick together.

So, after few trials and lots of errors, I finally produced delicious cookies that are nutritious enough for a great breakfast or a healthy tasty snack.  They are not exactly like the ones I had in France but they are darn close.

Muesli Cookies-2

I use Bob’s Red Mill Muesli which contains rolled oats, wheat, rye, barley, almonds, dates, sunflower seeds and walnuts. I add a good quality olive oil –  just enough to make them crispy and super crunchy instead of chewy.

Muesli Cookies with Fleur de Sel
 
Ingredients
  • 3 cups muesli
  • ¼ cup tart cherries coarsely chopped
  • ½ cup pecans coarsely chopped
  • ¼ cup raw sesame seeds
  • ¼ cup coco nibs
  • ½ tsp vanilla paste
  • ¼ cup olive oil
  • ¼ cup maple syrup
  • 3 tbs honey
  • 1 egg white room temperature and lightly beaten
  • ¼ tsp kosher salt
  • Fleur de sel for sprinkling
Instructions
  1. In a small pot, mix the honey, maple syrup, vanilla and oil and heat on low until the mixture starts to simmer. Immediately, turn off the stove and let the mixture cool until it reaches room temperature.
  2. In a large bowl, combine muesli, pecans, sesame seeds and kosher salt. Add maple syrup mixture and stir.
  3. Let the mixture sit for about 15 to 20 minutes until it softens.
  4. Stir in the beaten egg white. Continue working the mixture, in fact I recommend that you crush it for few seconds with the palm of your hands until it starts clumping together forming a ball.
  5. Add, the chopped cherries, cocoa nibs and stir. Scoop the mixture onto a baking sheet using an ice cream scoop. Lightly sprinkle each cookie with Fleur de Sel and bake at 300 degrees for 20 to 25 minutes.
Notes
The cookies will still be soft right out of the oven. They will get crispy as they cool. Make sure to let them cool for at least an hour before serving.