Category Archives: Gluten Free

Gluten Free Pumpkin Spice Cakelettes

There is always room for dessert – especially for sugar-free, gluten-free delicious desserts.

Gluten Free Pumpkin Spice Cakelettes1

When I invite people over, I want to be able to serve delicious desserts that deliver loads of flavor. Over the years, many of my friends started to follow a gluten-free diet. Consequently, it became increasingly difficult to entertain at home and live up to my standards.
So I decided to work on converting some of my favorite recipes into gluten-free versions. The goal was to create delicious desserts without bulk and flour. Desserts that anyone could enjoy whether or not they follow a gluten-free diet.

Gluten Free Pumpkin Spice Cakelettes

This recipe is an adaptation of King Arthur’s gluten-free pumpkin cake. The KA recipe uses their gluten-free mix. The reason I don’t use gluten-free baking mixes is because many of them contain Xanthan Gum, and I happen to be allergic to xanthan gum. Instead, I use a combination of almond flour and coconut flour and an extra egg for binding.

Gluten Free Pumpkin Spice Cakelettes-2

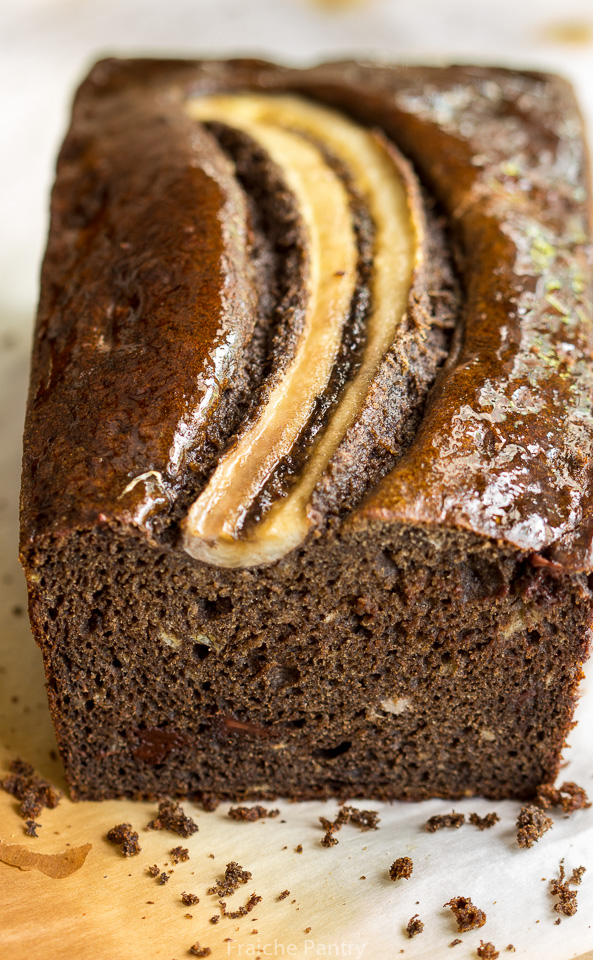
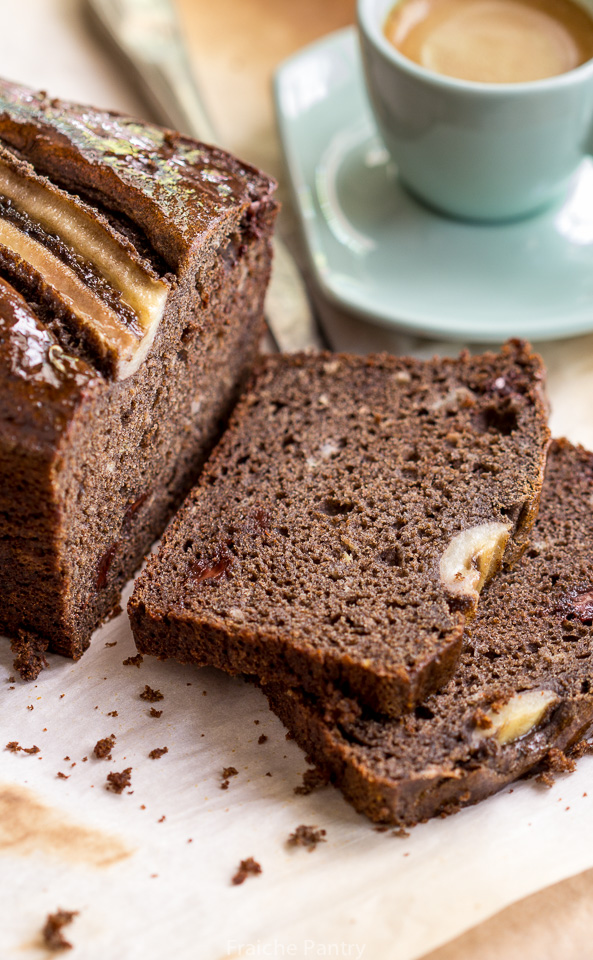
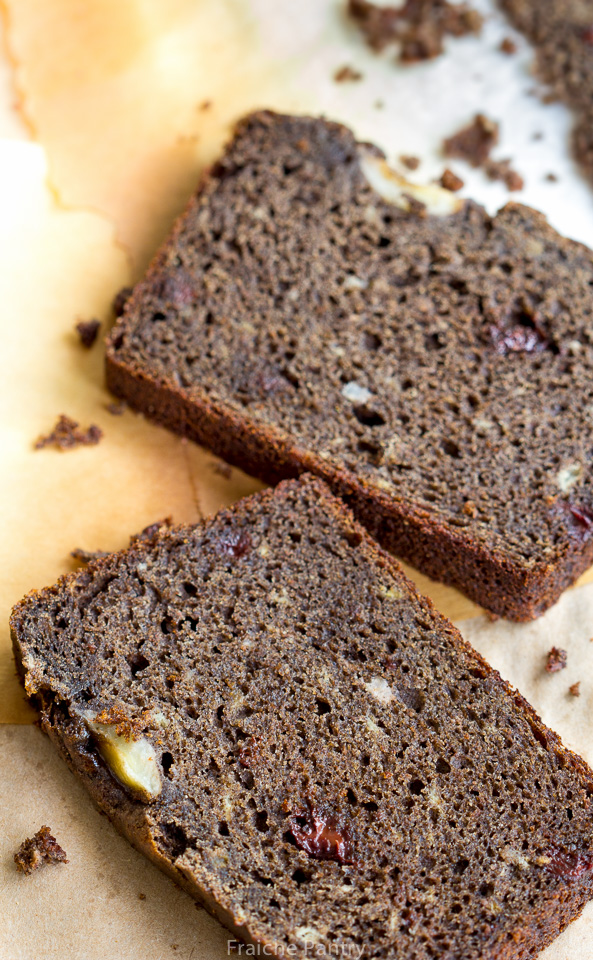
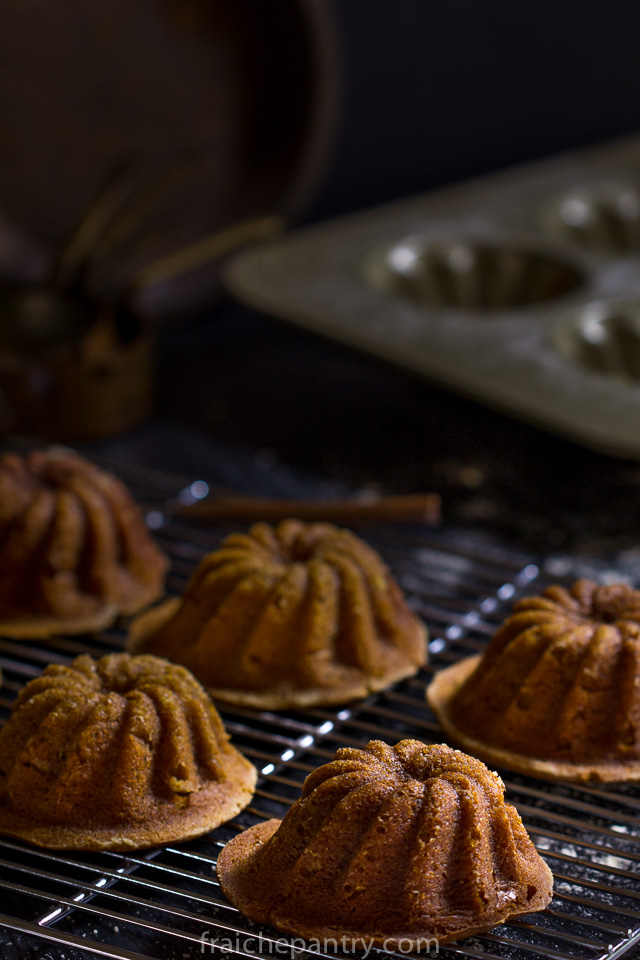
These are deliciously light, moist, sweet and spicy pumpkin cakelettes. The coconut flour adds a wonderful flavor without overwhelming the rest of the ingredients. The honey gives just enough sweetness to make it pleasant. Who’s missing gluten?

Gluten Free Pumpkin Spice Cakelettes
 
Ingredients
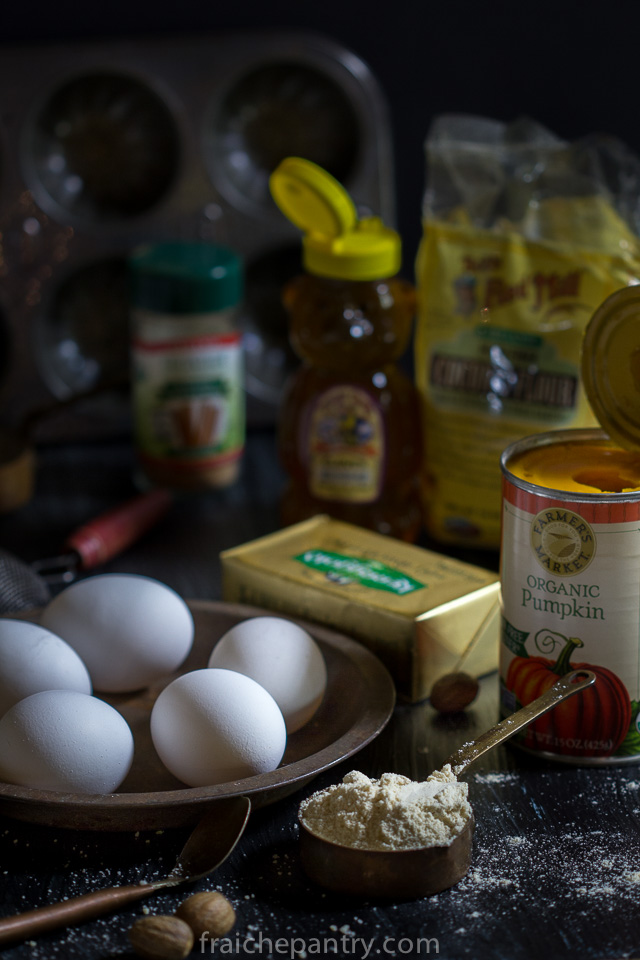
  • 1 can organic pumpkin puree
  • 8 oz of butter (room temperature)
  • ½ cup of honey
  • 4 extra large eggs (room temperature)
  • ½ cup coconut flour
  • 1 cup almond flour
  • ½ tsp salt
  • 1 Tbs pumpkin pie spice
  • 1 and ¼ tsp baking soda
Instructions
  1. An hour before making the cakelettes bring eggs and butter to room temperature.
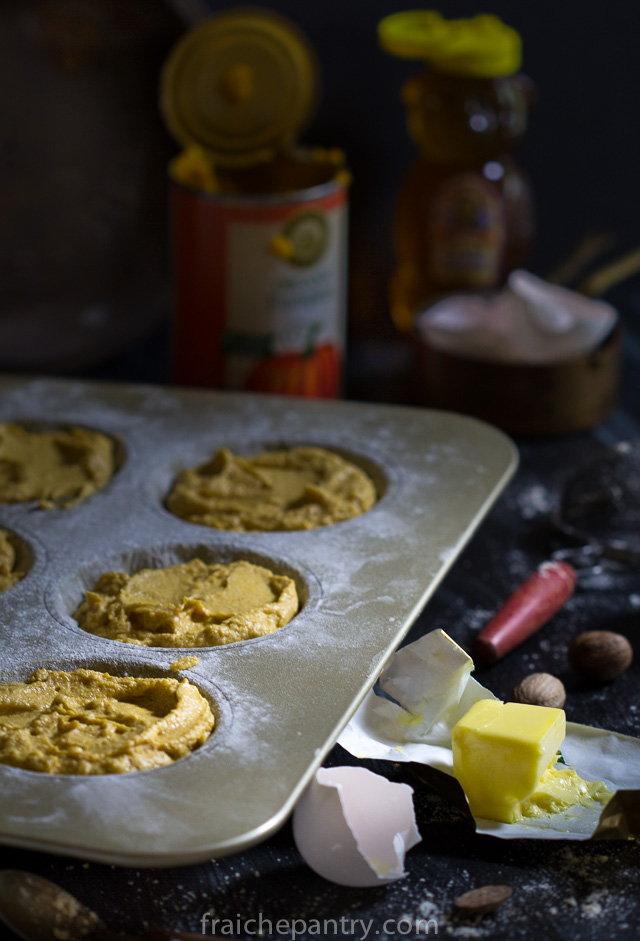
  2. Preheat oven to 350 degrees. Generously butter and flour a cakelette pan. Warm the honey before measuring by putting the container in a bowl of hot water (not boiling) for a couple of minutes.
  3. In a bowl mix together all dry ingredients. Using a mixer with flat attachment, cream softened butter for a couple of minutes. Add the honey and mix at medium speed for about 5 minutes until creamy and fluffy. Add eggs one at a time mixing well and scraping the sides of the bowl after each addition. By the fourth egg addition the emulsion of the batter will seem like it's breaking down (looking separated and weepy). No worries, once you add pumpkin purée and the dry ingredients, it will smooth out.
  4. Add pumpkin purée and mix then the dry ingredients and mix just enough to incorporate. Pour batter in buttered loaf pan and bake at 350 for 45 minutes... Watch that the top of the cake doesn't burn. If your oven tend to be on the hotter side, reduce the temp to 335 degrees.
Notes
If you are 100% gluten free, you can use rice flour to flour the pan. I found that using extra large eggs resulted in more leavening. If you don't have extra large eggs add an extra egg to the batter.


Buckwheat Chocolate Banana Bread with Tart Cherries

BuckwheatBananaBread-3

Always loved basic banana bread but this version quickly became my favorite. The first time I made it I used a 50/50 mix of plain flour and buckwheat flour – then I decided to experiment with a buckwheat only version – turning out a perfectly fluffy, moist and delicious loaf –  a healthy nutritious version of an American classic.

BuckwheatBananaBread-2

Why buckwheat? Though I’m not gluten free, I wanted to try my hand at a healthy version of banana bread. Buckwheat is high in protein, fiber and  loaded with nutrients. A great alternative to white flour baking, it has a delicious nutty flavor especially when paired with sweet ripe bananas and chocolate.

BuckwheatBananaBread-4

This recipe is simple and easy to make. Most of the ingredients you may already have in your pantry. All that is required is a bowl and a fork to mix the batter.

Buckwheat Chocolate Banana Bread
 
Ingredients
  • 1⅔ cups Bob's Red Mill buckwheat flour
  • 2 teaspoons baking powder
  • ½ teaspoon baking soda
  • 3 medium very ripe bananas, peeled + half a banana sliced lenghtwise
  • ¾ cup sugar
  • 2 large eggs
  • 1 ½ teaspoon vanilla extract
  • ¼ cup yogurt
  • 4 tablespoons buttermilk
  • ⅓ cup vegetable oil
  • ½ cup chocolate chips
  • ¼ cup dried tart cherries
Instructions
  1. Preheat an oven to 350°F. Generously grease a non-stick metal loaf pan (preferably 1½ lb. pan) with butter.
  2. In a bowl, combine the flour, baking powder, salt and baking soda.
  3. In a large bowl, smash the bananas with a fork. Add the sugar, yogurt, buttermilk, oil, eggs and vanilla and mix with a spoon/fork until well blended.
  4. Add the flour mixture to the banana mixture and stir just until blended. Gently mix in the chocolate chips and tart cherries.
  5. Scrape the batter into the prepared pan, spreading it evenly with the spoon.
  6. Gently lay the half banana on top of batter right in the center (optional).
  7. Bake in preheated oven until a toothpick inserted into the center of the bread comes out clean with just a few crumbs clinging to it, about 45 to 60 minutes.
  8. Remove the pan from the oven, set it on a wire cooling rack and let cool for 20 minutes.
  9. Gently run a table knife along the inside edge of the pan to loosen the bread from the sides.
  10. Using oven mitts, turn the pan on its side and slip the loaf out onto the wire rack. Let the loaf cool before serving. Makes 1 loaf.
Notes
If using 1 lb. loaf pan, batter may overflow a bit during baking


Roasted Heirloom Carrots with Harissa Aioli

HeirloomCarrotsroasted

I’m a full-fledged member of carrot-oholics anonymous. I’ve learned to love these root vegetables.

But, in truth, for most of my life, I never liked carrots. Raw, they’re not so bad. Cooked, I really loathed them. The taste of steamed or boiled carrots was so revolting to me.

So, why did I detest cooked carrots? I guess I never got over the shockingly bad tasting carrots my mom fed me from a jar when I was a baby. Is it possible to remember what food tasted like when you were a baby? I don’t know, I guess part of my brain still remembers the awful taste.

To this day, I feel for babies. The taste of baby food in jars is pretty awful. Okay, so the fruit ones are not that bad, but the vegetable ones are nasty – enough to scar your taste buds for life.

If you don’t remember what they taste like, pick up one of those carrot baby food jars and you’ll know what I’m talking about.

HeirloomCarrots-2

So, there was just no room for carrots in my repertoire. The one exception was when I was making a pureed veggie soup that included carrots. The pureeing process made the cooked carrot taste disappear into oblivion.

So why am I now into rabbit food?

It was when the heirloom variety caught my attention at a local farmers’ market.

Initially, it was their stunning rainbow colors that make them hard to ignore. Then, after bringing a bunch home and roasting them, I discovered that their delicious flavor is far superior to the modern carrots you find at grocery stores.

HeirloomCarrots

In recent years, carrots, especially heirloom, have enjoyed a huge spike in popularity. Chefs everywhere have been coming up with creative ways of cooking them. Finally no more boiled or steamed carrots. I was inspired to give the carrot a second chance. I now feel more at ease seeing it on my plate. I no longer associate the taste of carrots with my babyhood culinary trauma.

Roasting them became my favorite way to enjoy them. With its child-like simplicity, it is hardly a recipe. It is just a method of cooking them that brings out the sweeter more complex flavor. I don’t even peel them. I give them a good scrub, season them and then roast them. The beauty of it is you can use a simple seasoning such as salt, pepper and olive oil. Or, you can experiment with more exotic spices, such as Indian curry spices. The result is a great tasting veggie that will leave you licking your fingers…

Thyme

Serve them as the perfect side dish for chicken, fish or steak. Or have them as an appetizer with a nice glass of Pinot Noir or Gamay Beaujolais.

***Note: Due to the risk of salmonella, I am not using a traditional aioli recipe that calls for raw egg yolks. For this post, I use store bought mayonnaise as a substitute.

***Harissa is an aromatic chili pepper paste that is widely used in middle eastern foods. It is readily available in specialty stores and most grocery stores.

Thyme Roasted Heirloom Carrots with Harissa Aioli
Prep time: 
Cook time: 
Total time: 
 
Ingredients
  • 1 bunch organic heirloom carrots tops removed
  • 1 head of garlic unpeeled and cut in half
  • 8 sprigs fresh thyme chopped plus more for garnish
  • 3 tbs olive oil
  • Kosher salt
  • Fresh ground black pepper
Instructions
  1. Preheat oven to 400 degrees
  2. Thoroughly wash and dry the carrots. Slice the thick carrots in half lengthwise. Leave the skinny ones whole. Spread the carrots and garlic halves on a large cookie sheet. Season with salt, pepper, thyme and olive oil. Make sure the garlic halves are fully coated in olive oil.
  3. Roast at 400 degrees until tender - about 30 to 45 minutes depending on the thickness of the carrots.
  4. Remove from oven, Transfer to a serving plate. Sprinkle with few sprigs of fresh thyme and serve immediately with harissa aioli.
Notes
Some people blanch or steam the carrots for few minutes before roasting them. I skip this step.

 
Harissa Aioli
 
Ingredients
  • ½ cup mayonnaise
  • 2 garlic cloves minced
  • 1 tbs lemon juice
  • 1 tbs harissa
Instructions
  1. Whisk all four ingredients together. Adjust seasoning to taste..

Cumin Cilantro Pork Chops

Pork Chops

I usually shy away from cooking pork at home. Truthfully, I can’t say I gave it a fair shot. I’m usually pretty fearless when it comes to tackling food challenges but after a couple of botched attempts at making tender juicy pork chops, I gave up. It was easier to order at a restaurant.

Italian Eggplant

But lately, thanks to my friend Marcie, I have been making some pretty awesome pork chops.

I credit my renewed interest to Marcie because a few months ago she made a mouthwatering pulled pork dish using heritage meat she had ordered from Rinconada Dairy Farm. It was absolutely delicious.

An informative conversation with her on how to cook pork prompted me to try it again.

Asparagus

My mishaps were partly due to some misguided fears about illnesses associated with eating undercooked pork (pink doneness). I followed USDA guidelines for safe cooking which up until three years ago recommended that pork be cooked to 160 degrees, a temperature that greatly contributed to my failed experiments.

Garlic

Pork meat is as lean as skinless chicken breast, which makes it really easy to overcook.

My determination to get it right prompted some online research and I learned that in 2011, something exciting happened. As a result of new scientific studies, the Department of Agriculture decided to lower its safe cooking temperature for pork to 145 degrees.

Reducing the heat, buying the best, freshest cuts, and adding some of Marcie’s tricks yielded the juiciest and most tender pork meat.

Cilantro

Things I’ve learned:

The quickest, easiest way to prepare pork chops is stove top. The following few basic rules will guarantee tender juicy meat.

  • Buy bone-in pork chops. They’ll take a few minutes longer to cook but will ensure a tender meat.
  • A thirty minute marinate will infuse the meat and enhance the flavor
  • Bringing chops to room temperature before cooking will ensure even temperature inside out .

Cumin Cilantro Pork Chops


Cumin Cilantro Pork Chops
Serves: 2
 
Ingredients
  • 2 large bone-in pork chops
  • 2 tbs chopped fresh cilantro
  • 2 tbs coarsely ground toasted cumin seeds
  • 3 garlic cloves, crushed
  • ¼ cup white wine vinegar
  • ½ cup olive oil
  • 2 Italian eggplants sliced
  • 12 asparagus stalks blanched
  • Salt and pepper to taste
Instructions
  1. Prepare the marinade by combining cumin, cilantro, garlic, vinegar, olive oil, salt and pepper. Mix well. Place the pork chops in a bowl. Season with salt and pepper. Pour over half of the marinade and toss. In another bowl, place the eggplant slices and the blanched asparagus. Pour over the remaining marinade and toss. Marinate for 30 minutes.
  2. Heat a large non-stick frying pan over high heat. Cook eggplant and asparagus in batches until desired doneness. Transfer to a bow and keep warm.
  3. Using the same pan, brown the chops on high heat. Reduce heat to medium and cook chops 3 minutes on each side. Serve immediately..


Fennel, Green Apple and Mint Salad

Fennel Salad

Fennel is among my favorite winter vegetables.  It is so incredibly versatile that I’m always surprised people don’t use it as often as they should.  You can eat it raw, roasted or braised. It pairs exceptionally well with fish and can be a nice addition to any pork or meat dish. The fronds can be minced and used as a fresh herb.

Fennel

Fennel is available all year but it is best in the winter when it has a more aromatic taste.  It is very easy to prepare. You simply trim off the top and remove the fringy outer layer.

If you are a fennel lover like me, then you are in for a treat. Pairing fennel with granny smith apples and fresh mint creates an incredibly fresh and tasty salad.

Fresh Mint


For this salad you will need to slice the apples and the fennel as thinly as possible. Now will be a good time to dust off your mandoline.

Safety first: 

When slicing with the mandoline, make sure you use the hand guard correctly. Do not attempt to use the mandoline without the hand guard. The blades are super sharp and dangerous.

Fennel and Green Apple Salad
Serves: 4
 
Ingredients
  • 2 Granny Smith Apples
  • 2 fennel bulbs
  • 10 fresh mint leaves
  • 2 tbs lemon juice
  • ½ tsp Dijon mustard
  • ½ tsp honey
  • 4 tbs olive oil
  • Kosher salt
  • Freshly-ground black pepper
Instructions
  1. To make the vinaigrette: place the honey, lemon juice, Dijon mustard, salt and pepper in a bowl. Stir until well combined. Add the olive oil. Mix well then taste. If it’s too acidic add more olive oil and a little more honey if necessary. Adjust salt and set aside.
  2. Using a mandoline or a sharp knife, slice the apples and the fennel as thinly as possible. Arrange the apple and fennel slices on a plate. Sprinkle with mint leaves and spoon over the dressing.
Notes
For some variations, add few slices of radishes, a sprinkle of crumbled blue cheese and/or few candied walnuts. You can also serve this salad with some good brie and a slice of crusty bread. Allow the brie to settle at room temperature before serving..


Pork Tenderloin with Jerk Sauce

Having never made jerk style cuisine before, I wasn’t sure what to expect. I am glad I tried it.

Jerk PorkTenderloin

In my opinion, scotch bonnet , which is  the main ingredient in Jamaican jerk seasoning , is amongst the hottest peppers in the world. According to Wikipedia, It has a heat rating of 200,000 to 300,000 on the Scoville Scale compared to jalapeños which rate at 2500 to 8000. This baby packs some serious heat.

Habanero Chili

Another important ingredient is Jamaican allspice (not to be confused with the allspice ground combination powder we all use). Jamaican allspice, also known as Myrtle pepper, is a dark brown dried berry that looks like peppercorn. It is slightly peppery in flavor.

Last but not least, fresh Thyme, though not indigenous to the island, is a popular herb in Jamaican cuisine.

When all three ingredients are combined, the result is food that is spicy and sweet in flavor.

Jamaican cuisine is quite diverse and mention must be made of British, Spanish, Indian and Chinese influence.  The different cultures brought various dishes to the island resulting in a fusion of techniques and traditions.

PorkTenderloin

This is my first try at jerk cuisine and all I can say is ” it is awesome if you can handle the heat.”

The traditional jerk pork recipe requires marinating pork overnight. This is a speedy version  but nevertheless packs loads of flavor. It is deliciously hot and sweet. Sandwiches made with leftover jerk pork tenderloin are to die for.

PorkTenderloin

**Note: If you have never tried scotch bonnet peppers before you may want to start with one half instead of a whole pepper.  As with all hot chili peppers, you will need to omit the seeds to reduce heat. Be sure to wear gloves when handling hot peppers.

Ingredients:

  • 2 pork tenderloins
  • Jerk marinade

Jerk Marinade

  • 1 tsp Jamaican allspice
  • 4 scalions
  • 3 cloves of garlic
  • One 2-inch piece of fresh ginger (about 2 inches)
  • 1 scotch bonnet or habanero pepper seeded
  • 2 tbs fresh thyme leaves
  • 1 tbs brown sugar or honey
  • 1 tbs low sodium soy sauce
  • 1 tsp cinnamon
  • 1/2 tsp freshly ground nutmeg
  • 2 tbs red wine vinegar
  • 1/4 cup of fresh parsley leaves

Cut pork tenderloin into 1-inch pieces. Lightly flatten and season with salt pepper. Set aside.

To make the jerk marinade, place all ingredients in a food processor and blend until smooth. Transfer marinade to a bowl.  Add pork and marinate for two hours.

Preheat a non-stick  pan with some olive oil over medium-high heat. Cook pork pieces for 2 minutes on each side until nicely brown. Do not over cook. Remove pork from pan and set aside. Add the remaining jerk marinade to the pan and simmer for 3 minutes. Pour the sauce over pork and serve with Jamaican style rice.