Fennel, Green Apple and Mint Salad

Fennel Salad

Fennel is among my favorite winter vegetables.  It is so incredibly versatile that I’m always surprised people don’t use it as often as they should.  You can eat it raw, roasted or braised. It pairs exceptionally well with fish and can be a nice addition to any pork or meat dish. The fronds can be minced and used as a fresh herb.

Fennel

Fennel is available all year but it is best in the winter when it has a more aromatic taste.  It is very easy to prepare. You simply trim off the top and remove the fringy outer layer.

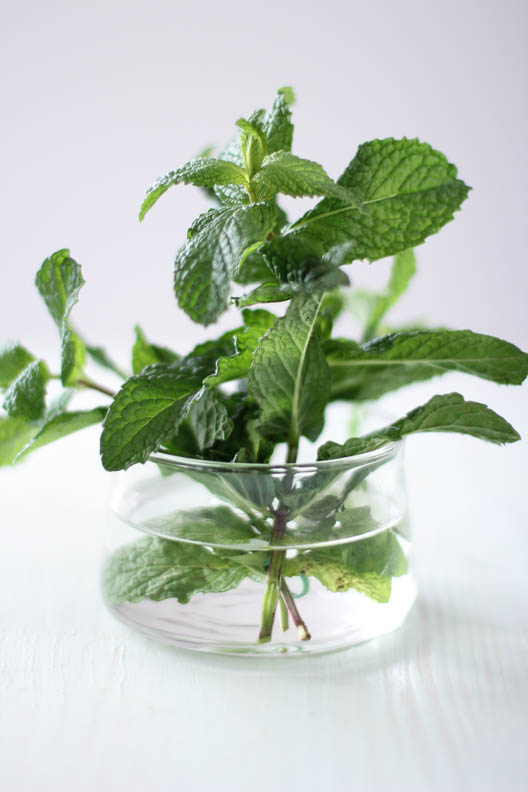
If you are a fennel lover like me, then you are in for a treat. Pairing fennel with granny smith apples and fresh mint creates an incredibly fresh and tasty salad.

Fresh Mint


For this salad you will need to slice the apples and the fennel as thinly as possible. Now will be a good time to dust off your mandoline.

Safety first: 

When slicing with the mandoline, make sure you use the hand guard correctly. Do not attempt to use the mandoline without the hand guard. The blades are super sharp and dangerous.

Fennel and Green Apple Salad
Serves: 4
 
Ingredients
  • 2 Granny Smith Apples
  • 2 fennel bulbs
  • 10 fresh mint leaves
  • 2 tbs lemon juice
  • ½ tsp Dijon mustard
  • ½ tsp honey
  • 4 tbs olive oil
  • Kosher salt
  • Freshly-ground black pepper
Instructions
  1. To make the vinaigrette: place the honey, lemon juice, Dijon mustard, salt and pepper in a bowl. Stir until well combined. Add the olive oil. Mix well then taste. If it’s too acidic add more olive oil and a little more honey if necessary. Adjust salt and set aside.
  2. Using a mandoline or a sharp knife, slice the apples and the fennel as thinly as possible. Arrange the apple and fennel slices on a plate. Sprinkle with mint leaves and spoon over the dressing.
Notes
For some variations, add few slices of radishes, a sprinkle of crumbled blue cheese and/or few candied walnuts. You can also serve this salad with some good brie and a slice of crusty bread. Allow the brie to settle at room temperature before serving..


Whole Grain Bread

Whole Wheat Bread

Julia Child once said: “ How can a nation be called great if its bread tastes like kleenex?

So, does bread today taste like kleenex?  pretty close in my opinion and unless you are lucky enough to live around the corner from some of the great artisan bakeries, chances are any humble loaf you make at home is far better than anything you buy at the store.

Engredients In fact some may be surprised how many people are now baking their own bread.

Thanks to a New York Times article about an old bread making technique most recently revived by Jim Lahey of Sullivan Bakery in New York, more people are enjoying homemade bread.

Once I started making my own bread I never went back to store bought loaves.  I usually make this loaf with homegrown culture but for this post I am using a small amount of commercial yeast.

The pictures below show the stretch and fold technique.

Bread Dough-2

Dough becomes smooth and puffy after couple of series of stretch and folds.

Bread Dough

Bread Dough
Whole Wheat Bread

Whole Wheat Bread
 
Ingredients
  • 200g whole wheat flour
  • 300g bread flour
  • 10g wheat germ
  • 10g wheat bran
  • 375g lukewarm water
  • ¼ tsp instant yeast
  • 10g kosher salt
Instructions
The day before:
  1. In a large bowl combine bread flour, whole wheat flour, wheat bran and wheat germ. Sprinkle the yeast over the flour mixture and stir to disperse. Add water and mix until no dry flour remain. Cover bowl with plastic wrap and let sit at room temperature for 30 minutes.
  2. After the resting period, add the salt and a couple tbs of lukewarm water. Using wet hands, mix the dough squeezing it between your fingers until salt is thoroughly mixed in.
  3. Cover the bowl with plastic wrap and let the dough rest for a period of 2 hours during which you will perform a series of folds every 30 minutes taking care not to deflate the dough. To do a fold, grab one side of the dough, stretch it out and folded over itself - slightly rotate the bowl and grab another side of dough and repeat the fold until you perform 4 folds (think of the dough as having four corners and you will perform a stretch and fold for every corner). This will strengthen the dough. You will do this series of folds every 30 minutes during the 2 hour resting period.
  4. After the last fold let dough rest in covered bowl for 2 hours in the refrigerator.
  5. If not using a proofing basket, line a medium size bowl with a dry kitchen towel. Dust it generously with flour.
  6. Transfer dough onto a flour dusted kitchen counter. Shape the it into a taut boule and pop it seam side up into floured lined bowl or proofing basket. Dust top of dough with flour. Loosely cover with a piece of plastic wrap and a kitchen towel on top. Leave in refrigerator overnight.
Baking day:
  1. Place a heavy oven proof pot with lid in cold oven. Preheat to 500 degrees.
  2. Take the dough out of the refrigerator and gently invert dough onto a piece of parchment paper.
  3. Using oven mitts, remove hot pot from oven. With a sharp knife score dough by making two incision across the top.
  4. Grab sides of parchment paper and carefully lower dough into hot pan taking care not to burn yourself. Cover with lid and return to oven. Bake at 450 degrees for 25 minutes. Reduce heat to 400 - carefully remove lid and continue baking for another 20 minutes or so until crust is golden brown.
  5. Transfer loaf to a cooling rack and let cool.
Notes
To get a nice open crumb you need a fairly wet dough about 75% hydration. Different flour brands have different absorption rate and depending on the brand you use, you may need to slowly increase the amount of water..


Pasta with Wild Arugula

Pasta with Wild Arugula


Pasta tossed with garlic infused olive oil and fresh wild arugula makes for an incredibly light and flavorful dish. This recipe exemplifies speedy weeknight dinner. It is literally ready within few minutes.

Wild Arugula


The real star here is the wild arugula. It has clean and peppery taste that is quite different from the more familiar milder arugula. To truly appreciate its flavor you should eat it raw.  It is simply irresistible.

Pasta


All I know is I cannot have enough of it. I use it in everything. Most days I enjoy it as a salad. Sometimes I sprinkle it on pizza and other days I add it to  my sandwiches..

Garlic Infused Olive Oil

Pasta with Wild Arugula
 
Ingredients
  • 1 lb pasta shells
  • 1 bunch of wild arugula
  • 4 cloves of garlic thinly sliced
  • ½ tsp chili pepper flakes
  • Olive oil
  • Salt and pepper
  • Freshly grated parmesan
Instructions
  1. Cook pasta according to package instructions
  2. In a large pan, gently heat olive oil. Add garlic slices and cook on low heat until slightly brown. Add chili pepper flakes and the wild arugula. Toss and remove from heat.
  3. Drain the pasta then toss it in with the wild arugula. Season with salt and pepper and serve immediately with freshly grated parmesan.
Notes
When you brown the garlic, be sure not to burn it - otherwise it will taste bitter.


Cedar-Planked Brie with Shiitake Mushrooms

Cedar-Planked Brie

For me a piece of cheese and a crusty baguette make the perfect marriage. Add a glass of wine and you have a menage a trois made in heaven.

France produces over 200 types of cheeses and it can be quite difficult to choose a favorite. Some varieties are more known than others. One of my favorites is Brie –  or as a connoisseur would call it  “true Brie”.

Considered to be perhaps the most popular cheese in the world, authentic Brie has a creamy texture and a sweet buttery flavor with a hint of mushrooms.

Planked-Brie with Mushrooms

Brie’s popularity soared in the 70s and 80s. Unfortunately, not all Bries are created equal. French Law requires that Brie be made from unpasteurized (raw) milk. In 1985 the FDA began the require that all cheeses be pasteurized or cured a minimum of 60 days which pretty much outlawed true Brie in the United States.

To make matters worse, France, like England with its cheddar, neglected to protect/trademark the term Brie. As a result, the name Brie became a generic term allowing for a wide variety of knock-offs to flood the American market.

However, in 1980, Brie de Meaux and Brie de Melun were awarded AOC (appellation d’origine contrôlée) status and were protected under French law. They are considered true Brie and both are produced just a few miles east of Paris.

Mushrooms
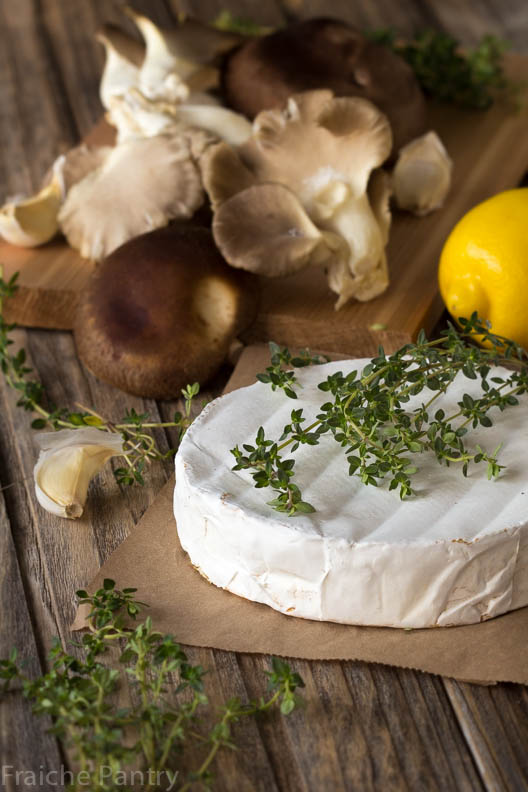
Brie de Meaux is more delicate than its sister Brie de Melun which is more rustic and full flavored. Good luck finding either of them in the United States. They are both made from raw milk and thus prohibited from entering the US.

The only way for Americans to experience true Brie is to travel outside of the US.

For this recipe I used a Brie-style cheese made from pasteurized milk. The use of soaked cedar plank adds a subtle woodsy flavor to the baked brie which further enhances the flavor of the mushroom topping.

I usually bake cedar-planked Brie on the bbq using indirect heat.  Today I’m doing it in a 400 degree oven.

If you don’t have a cedar plank on hand, use a baking sheet lined with parchment paper.

5.0 from 2 reviews
Cedar-Planked Brie with Shiitake Mushrooms
Serves: 4
 
Ingredients
  • 1 wheel firm, ripe brie about 13.5 oz room temperature
  • ½ lb fresh shiitake mushrooms
  • ¼ lb fresh oyster mushrooms
  • 1 clove garlic thinly sliced
  • 4 sprigs fresh thyme
  • The zest of one lemon
  • ½ cup dry white wine
  • Olive oil
  • Salt and pepper
Instructions
  1. Soak Plank in lukewarm water for 2 hours. You may have to weigh it down to submerge.
  2. Preheat oven to about 400 degrees.
  3. Put mushrooms in a bowl and drizzle with olive oil just enough to moisten.
  4. Add garlic slices, lemon zest, thyme, salt and pepper and toss to combine.
  5. In a large skillet heat one table spoon of olive oil. Add the mushroom mixture and the wine. Cook until golden brown. Remove from the heat and keep warm.
  6. Drain the plank and place onto a baking sheet lined with foil. Lightly brush the plank with olive oil. Using a warm knife, carefully cut the brie wheel in half horizontally. Try to not damage the outside rind. It will keep the Brie from leaking. Place both halves rind side down onto prepared cedar plank. Bake in oven for 10 to 12 minutes or just until cheese starts to slightly bubble. Do not overcook or it will start to overflow.
  7. Remove the brie from the oven. Keep it on the plank. Top each half with half of the mushroom mixture.
  8. Serve directly from the plank with a nice crusty baguette or slices of country bread.
Notes
To cut the brie in half, try using a piece of unflavored dental floss. With a pairing knife, make an initial cut halfway down along the outer side of the brie. Take a long piece of dental floss and wrap each end around each index finger. Starting at the front of the wheel at the initial cut, cut through the wheel with the floss, separating the top half from the bottom.


Muesli Cookies with Fleur de Sel

Muesli Cookies

Years ago I was living in Chambery, a beautiful little town in the Rhône-Alpes region of France.  There was a little cafe, where I used to stop for my mid-morning caffeine fix. I would get my cafe espresso and a small cookie called “Croustillant de Muesli Choco au Sirop D’érable” (Muesli chocolate crunch-cookie with maple syrup).

I loved those cookies. I was so addicted to them I would literally devour them by the handful. They were that crazy-good. Just the right amount of sweetness and salt. Crispy and  super-crunchy.  And if that wasn’t enough, they were super nutritious.

I’ve never been able to find anything like them in Southern California.  Every now and then, I would get a craving for them so I decided it was time to try and make my own Croustillant de Muesli Choco.

After some online research and few recipes later, I struck out. I couldn’t find any recipe resembling the Croustillant de Muesli I had at that cafe. I decided to just start with a basic recipe for granola bars and work my way from there.

I made several attempts at replicating those wonderful cookies. My goal was to reduce the amount of sugar usually found in commercial granola bars.

One problem I kept running into is how to get the mixture to clump together without adding too much honey or maple syrup. Keep in mind, I was working from a memory of something that goes several years back.

Muesli Cookies-3

After more research on the internet, I discovered that one of the many secrets to making homemade granola bars was to add an egg white. The lightly beaten egg white acts like a glue and helps the granola mixture stick together.

So, after few trials and lots of errors, I finally produced delicious cookies that are nutritious enough for a great breakfast or a healthy tasty snack.  They are not exactly like the ones I had in France but they are darn close.

Muesli Cookies-2

I use Bob’s Red Mill Muesli which contains rolled oats, wheat, rye, barley, almonds, dates, sunflower seeds and walnuts. I add a good quality olive oil –  just enough to make them crispy and super crunchy instead of chewy.

Muesli Cookies with Fleur de Sel
 
Ingredients
  • 3 cups muesli
  • ¼ cup tart cherries coarsely chopped
  • ½ cup pecans coarsely chopped
  • ¼ cup raw sesame seeds
  • ¼ cup coco nibs
  • ½ tsp vanilla paste
  • ¼ cup olive oil
  • ¼ cup maple syrup
  • 3 tbs honey
  • 1 egg white room temperature and lightly beaten
  • ¼ tsp kosher salt
  • Fleur de sel for sprinkling
Instructions
  1. In a small pot, mix the honey, maple syrup, vanilla and oil and heat on low until the mixture starts to simmer. Immediately, turn off the stove and let the mixture cool until it reaches room temperature.
  2. In a large bowl, combine muesli, pecans, sesame seeds and kosher salt. Add maple syrup mixture and stir.
  3. Let the mixture sit for about 15 to 20 minutes until it softens.
  4. Stir in the beaten egg white. Continue working the mixture, in fact I recommend that you crush it for few seconds with the palm of your hands until it starts clumping together forming a ball.
  5. Add, the chopped cherries, cocoa nibs and stir. Scoop the mixture onto a baking sheet using an ice cream scoop. Lightly sprinkle each cookie with Fleur de Sel and bake at 300 degrees for 20 to 25 minutes.
Notes
The cookies will still be soft right out of the oven. They will get crispy as they cool. Make sure to let them cool for at least an hour before serving.


French Onion Soup

What do the Winter Olympic Games have to do with French Onion Soup?

Absolutely nothing!

Except the thought of France being so far behind Canada, made me crave this French comfort soup.

French Onion Soup

We’ve been watching the Winter Olympic Games for the past few days. So far Canada is way ahead of France in medal counts.

I am not happy about that. Dan is Canadian (also, we are both US citizens) so you can only imagine what it is like in our household supporting different teams.

Dan & I see eye-to-eye on a lot of things but when it comes to supporting our home teams we are rivals.

Don’t get me wrong, marriage is still more important than sports, or so they say,  but it’s fun to get into the spirit of a friendly rivalry once in a while. It keeps things interesting if you know what I mean…

I must say, this soup never fails to satisfy me. We had it as our main course and it paired beautifully with a glass of Cotes du Rhone..

There have been a lot of debates about traditional French onion soup. Some of them about the provenance, some of them about key ingredients. Some people are convinced you should only use water.  To me, It matters little whether you use stock or water. The result is the same, a very tasty onion soup –  as long as you don’t decide to use fish stock. That would make it fish soup…

Onions & Fresh Thyme

Regardless of what you use to make this soup, there is only one thing you need to worry about: caramelization. Without proper caramelization, you will not be able to achieve that fantastic deep flavor and beautiful color.

Onion caramelization takes time. You can’t rush this process. You just have to give it the time it needs and deserves.

FreshThyme

I hope you enjoy this terrific soup..

French Onion Soup
Serves: 4
 
Ingredients
  • Ingredients:
  • 5 medium brown onions thinly sliced
  • 2 red onions thinly sliced
  • 4 tbs unsalted butter
  • 2 tbs all purpose flour
  • ½ cup dry sherry or cognac
  • 1 small bunch fresh thyme tied into a bouquet
  • 4 cups chicken, beef or veal stock (homemade if possible)
  • 3 cups grated Emmental or Gruyere cheese
  • 4 slices of country style bread
Instructions
  1. Melt butter in a large dutch oven. Add onions, salt and pepper and cook on medium to low heat for about an hour, steering occasionally until the onions are soft and caramelized.
  2. Lower the heat and stir in the flour to coat the onions. Cook for 3 to 5 minutes steering constantly to loosen any dried bits. Do not burn onions.
  3. Add fresh thyme, dry sherry and beef stock. Bring the soup to simmer and cook for 15 minutes. Taste the soup and adjust seasoning accordingly. Can be made ahead.
  4. Lightly toast bread slices – just enough to dry them. Do not brown.
  5. Remove the Thyme. Ladle the soup in oven safe bowls. Top with a slice of toasted bread and some cheese. Using a baking sheet, transfer bowls to oven and Broil on high until cheese melts and top is slightly brown and crisp.

Avocado with Shallot Vinaigrette

I simply can’t have enough of this buttery fruit (yes, it is actually a fruit). Avocados are my go to comfort food. Something about them that just puts me in a good mood.

Avocados with Shallots

I usually make my favorite guacamole recipe but today I didn’t feel like doing a lot of chopping. So I opted for an avocado salad with shallot vinaigrette. Quick and delicious. I hope you enjoy this heart-healthy and hunger-eradicating dish..

Avocados

Avocado with Shallot Vinaigrette
Serves: 4
 
Ingredients
  • 2 avocados
  • 1 tbs minced shallot
  • 1 tsp chopped cilantro
  • the juice of one lime
  • Shallot vinaigrette
Vinaigrette:
  • 1 tbs minced shallot
  • 1½ tbs red wine vinegar
  • ½ tsp Dijon mustard
  • ¼ cup olive oil
  • salt & pepper
Instructions
Vinaigrette:
  1. To prepare the vinaigrette: soak shallots in vinegar for 15 minutes. Whisk in mustard. Add olive oil, salt and fresh ground pepper. Mix well then taste. Adjust seasoning to your taste.
Avocados:
  1. Cut the avocados in half. Remove the pits. Cube them but keep them in their skin. Rub the top with some lime juice to prevent browning. Sprinkle halves with minced shallots and chopped cilantro before dousing them with vinaigrette.


French Rustic Berry Tart

Nothing would be more tiresome than eating and drinking if god had not made them a pleasure as well as a necessity.”  –  Voltaire

BerryTart

Today, with the rain dampening my spirit, I find myself in a mood for a pleasurable eating experience.  What could be more satisfying than a piece of berry tart and a cup of earl grey tea to brighten my day ?

Berries

This is a wonderful delicate tart that begs to be served with a scoop of vanilla ice cream. Make it your meal or your snack. Whatever you decide, you are in for a treat.


BerryTart Crust

You can make this pastry dough in a snap using a food processor.

BerryTart


**Note: For the filling, Splenda can be substituted for sugar. Be sure to mix it with the cornstarch.

French Rustic Berry Tart
 
Ingredients
  • 2 cups all-purpose flour
  • ½ teaspoon salt
  • 12 tablespoons cold Unsalted butter cut into chunks
  • 2 large egg yolk (reserve the whites)
  • 5 to 6 teaspoons ice water
  • 2 cups raspberries
  • 2 cups blackberries
  • 4 tbs sugar
  • 3 tsp cornstarch or flour
Instructions
  1. In a food processor, mix flour and salt. Add butter and pulse until mixture resembles a coarse meal. Add egg yolks and water one spoon at a time; processing just until dough begins to form a ball. Form dough into a disk and wrap in plastic wrap. Let dough rest in refrigerator for 15 to 20 minutes.
  2. While the dough is resting, turn the oven on and preheat to 375 degrees (350 if your oven tend to be too hot).
  3. Line a baking sheet with parchment paper. Set one piece of plastic wrap on a work surface. Lightly dust it with flour. Set dough in center of plastic wrap sheet. Lightly dust dough surface with flour and cover with another piece of plastic wrap. With a rolling pin, roll dough evenly into a 14 inch disk.
  4. Peel off top sheet of wrap and invert dough into lined baking sheet. Remove remaining plastic wrap. In a small bowl, Mix sugar and cornstarch. Sprinkle center of dough with two tablespoons of cornstarch mixture – this will form a seal and prevent crust from getting soggy during baking. Distribute berries in center of pastry. In a bowl, Sprinkle remaining cornstarch mixture over berries. Gently fold edges over berries pleating to fit. Leave an opening of about six inches wide in center. Brush pastry with reserved egg whites and sprinkle with sugar.
  5. Bake tart at 375 until crust is golden and juices in center bubble. Cool in pan for 20 minutes before serving.
Notes
**Note: Do not use frozen berries. They will release too much liquid which will result in a very soggy crust.


Pork Tenderloin with Jerk Sauce

Having never made jerk style cuisine before, I wasn’t sure what to expect. I am glad I tried it.

Jerk PorkTenderloin

In my opinion, scotch bonnet , which is  the main ingredient in Jamaican jerk seasoning , is amongst the hottest peppers in the world. According to Wikipedia, It has a heat rating of 200,000 to 300,000 on the Scoville Scale compared to jalapeños which rate at 2500 to 8000. This baby packs some serious heat.

Habanero Chili

Another important ingredient is Jamaican allspice (not to be confused with the allspice ground combination powder we all use). Jamaican allspice, also known as Myrtle pepper, is a dark brown dried berry that looks like peppercorn. It is slightly peppery in flavor.

Last but not least, fresh Thyme, though not indigenous to the island, is a popular herb in Jamaican cuisine.

When all three ingredients are combined, the result is food that is spicy and sweet in flavor.

Jamaican cuisine is quite diverse and mention must be made of British, Spanish, Indian and Chinese influence.  The different cultures brought various dishes to the island resulting in a fusion of techniques and traditions.

PorkTenderloin

This is my first try at jerk cuisine and all I can say is ” it is awesome if you can handle the heat.”

The traditional jerk pork recipe requires marinating pork overnight. This is a speedy version  but nevertheless packs loads of flavor. It is deliciously hot and sweet. Sandwiches made with leftover jerk pork tenderloin are to die for.

PorkTenderloin

**Note: If you have never tried scotch bonnet peppers before you may want to start with one half instead of a whole pepper.  As with all hot chili peppers, you will need to omit the seeds to reduce heat. Be sure to wear gloves when handling hot peppers.

Ingredients:

  • 2 pork tenderloins
  • Jerk marinade

Jerk Marinade

  • 1 tsp Jamaican allspice
  • 4 scalions
  • 3 cloves of garlic
  • One 2-inch piece of fresh ginger (about 2 inches)
  • 1 scotch bonnet or habanero pepper seeded
  • 2 tbs fresh thyme leaves
  • 1 tbs brown sugar or honey
  • 1 tbs low sodium soy sauce
  • 1 tsp cinnamon
  • 1/2 tsp freshly ground nutmeg
  • 2 tbs red wine vinegar
  • 1/4 cup of fresh parsley leaves

Cut pork tenderloin into 1-inch pieces. Lightly flatten and season with salt pepper. Set aside.

To make the jerk marinade, place all ingredients in a food processor and blend until smooth. Transfer marinade to a bowl.  Add pork and marinate for two hours.

Preheat a non-stick  pan with some olive oil over medium-high heat. Cook pork pieces for 2 minutes on each side until nicely brown. Do not over cook. Remove pork from pan and set aside. Add the remaining jerk marinade to the pan and simmer for 3 minutes. Pour the sauce over pork and serve with Jamaican style rice.


Spring Pea Soup with Mint

Lately it’s been really cold in Los Angeles. Nothing like the blizzards they’ve been having on the East Coast but very cold (brrrrr) by Southern California standards.  These low temperatures triggered my mood for soup. I’ve been especially craving green pea soup.

Growing up, I didn’t like green peas. As the years went by my palate gained a taste for them. They are now a healthy staple in my diet. I love their vibrant color, sweet taste and starchy texture.

I hope you like this spring-inspired soup as much as I do..
Green Pea Soup


IMG_4550Mint


20131110-GreenPeaSoup-IngredientsGreenPeaSoup

When in season, I use fresh peas. Today, I am using frozen organic peas. For the success of this recipe, It is important to adjust the amount of mint to your taste.

Green Peas

Spring Pea Soup with Mint
 
Ingredients
  • 4 cups fresh or frozen peas
  • 1 small onion chopped
  • 3 garlic cloves peeled and smashed
  • 2 cups organic chicken stock
  • 3 sprigs fresh mint
  • ¼ tsp French four spices (see below to make your own mix)
  • 2 Slices crisped prosciutto for garnish
Instructions
  1. In a sauce pan, heat a couple of tablespoons of olive oil. Add chopped onions and garlic and cook until soft and translucent.
  2. Add peas, half the chicken stock, salt and black pepper. Bring to boil then lower the heat and cook for about three minutes.
  3. Turn off stove, add mint and puree mixture using an immersion blender.
  4. If using a counter top blender, transfer mixture to blender and puree.
  5. Transfer soup back to pot and add more chicken stock if needed. Adjust seasoning with salt and pepper. Simmer for two minutes. Do not overcook the soup.
  6. To crisp prosciutto, heat a non-stick pan over medium high heat. Add prosciutto slices. Cook until the edges curl and the slice become crispy and golden.
  7. Serve soup in bowls with a garnish of crispy prosciutto and a drizzle of fruity olive oil.
  8. **Note: you can mix your own French four spices by combining: 1 tbs ground white pepper, 1 tsp ground ginger, 1 tsp grated nutmeg and ¼ tsp ground cloves. Keep in an airtight container for up to six months.
  9. *The flavor of this soup is enhanced on the second day.